PHP extensions and values for a virtual server can be managed in multiple ways: via the global php.ini file, using local .user.ini file or through Web Hosting Management.
Adding and Modifying the Global php.ini File
The global php.ini file is a PHP configuration file where settings are loaded in addition to server defaults. This file can adjust nearly all PHP settings, limits, load modules, etc. All configurations affect both the main domain and all *.example.com subdomains, with changes applying immediately to new PHP processes.
By default the global php.ini file does not exist on the server, so it must first be added to the server:
/data01/virt1234/domeenid/www.example.com/phpini/global/php.ini
The most reliable way to find the correct location and check if the global php.ini file is loaded by PHP is to view phpinfo(). To do this, create a PHP file with any name in the root directory of the main or subdomain and insert into the file following:
<?php phpinfo();
.user.ini File and How To Modify It
By default the .user.ini file does not exist on the server. You can create this file in any directory and it will automatically also apply to all subdirectories.
If you want it to affect both the main domain and subdomains simultaneously, place it in the virtual server’s domain directory that contains the root directories for both the main and subdomains:
/data01/virt1234/domeenid/www.example.com/
If multiple domains are under a single virtual account and you want single .user.ini file to affect all domains, then add the .user.ini file to the virtual server’s home directory:
/data01/virt1234/
Changes made to the file affect both HTTP and HTTPS hosts at the same time.
Changing PHP Extensions From Web Hosting Management
The most common PHP extensions can be changed directly from the My Zone Web Hosting Management.
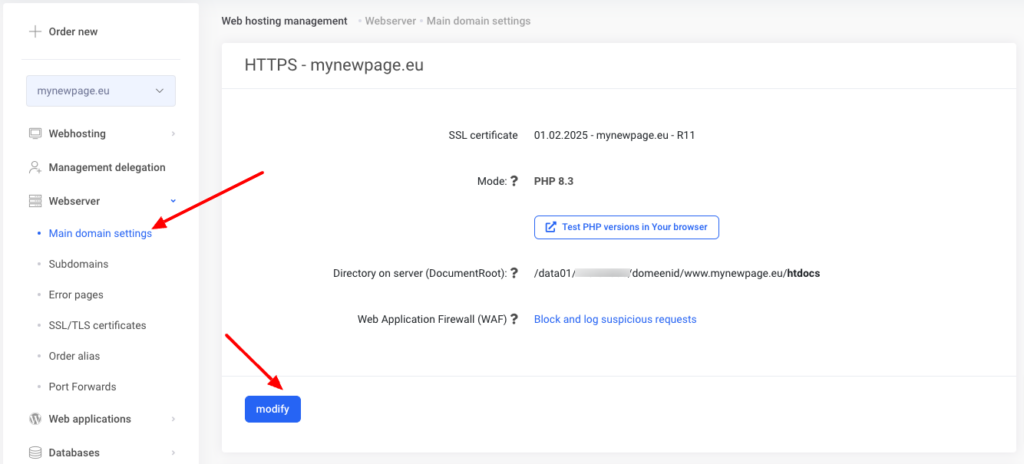
To do this, choose from menu on Webhosting page: Webserver -> Main domain settings or Subdomains depending on whether you want to activate or change the PHP extension on the main domain or on the subdomain.
In the next example for main domain, click on modify:
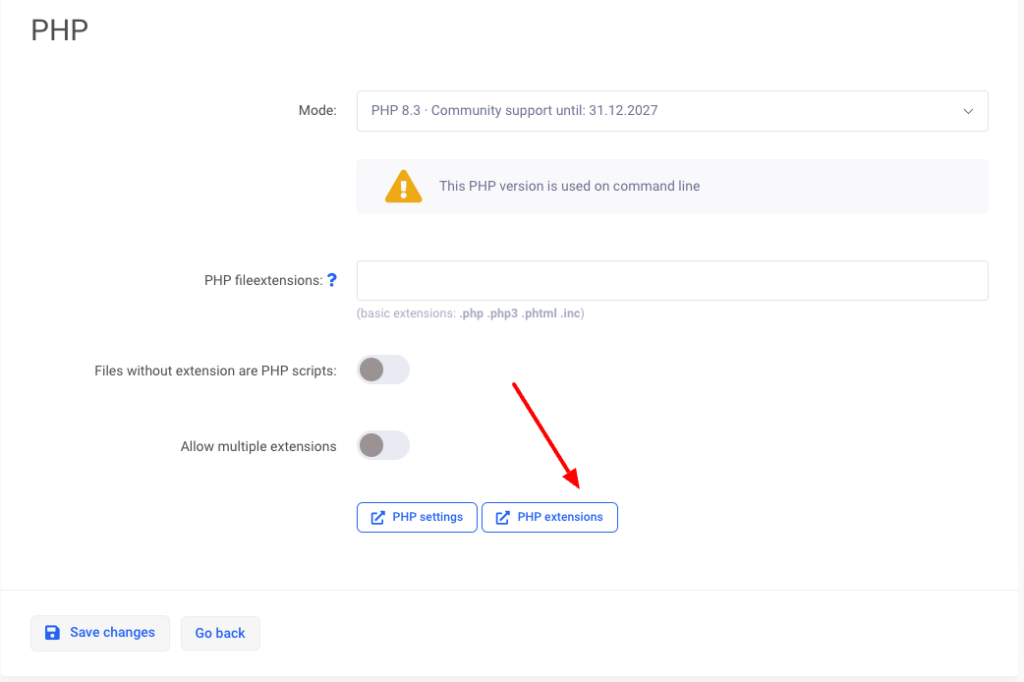
Under PHP subsection choose PHP extensions:
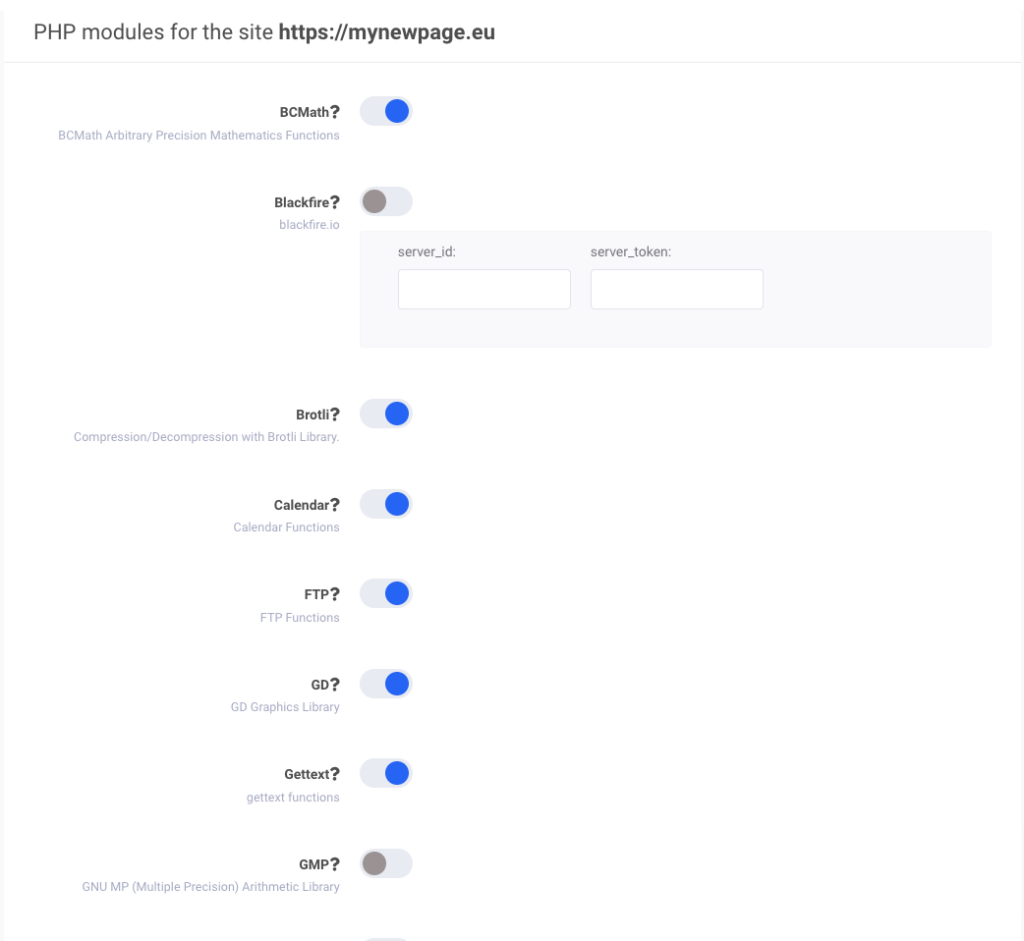
On the next page list of possible extensions are displayed:
To save changes, click on modify at the bottom of the page.
Examples of Settings That Can Be Changed Using the php.ini and .user.ini Files
Here are some examples of how to change common PHP settings.
Max Execution Time
The default value is 30 seconds. This sets the maximum running time of the PHP script in seconds. To change, add the following line:
max_execution_time = 60
PHP Memory Limit
The default value is 1024M. Add the following line to increase the value:
memory_limit = 1500M
Display Errors
Display errors setting can be used to turn on/off the displaying of the PHP errors. By default error display is on, add the following line to turn it off:
display_errors = off
Changing the Name for NewRelic Application
newrelic.appname = "My App"


