Why is it important to protect all forms on a website?
- Reducing Spam: Bots can easily fill out unprotected forms, resulting in large amounts of spam being sent from your website to various mailboxes.
- Maintaining Data Accuracy: Bots can input incorrect data, which interferes with real user data and complicates user management.
- Enhancing Security: CAPTCHA solutions protect forms from malicious attacks, such as brute-force attacks on login forms, which could lead to account hijacking.
- Saving Server Resources: Spam attacks consume server resources and can slow down the website, negatively affecting user experience.
Protecting WordPress Website Forms
Cloudflare Turnstile
Step 1
Before protecting forms using Cloudflare Turnstile, create a Cloudflare account or log in to an existing one.
Start the account creation process here by clicking the “Get started for free” button.
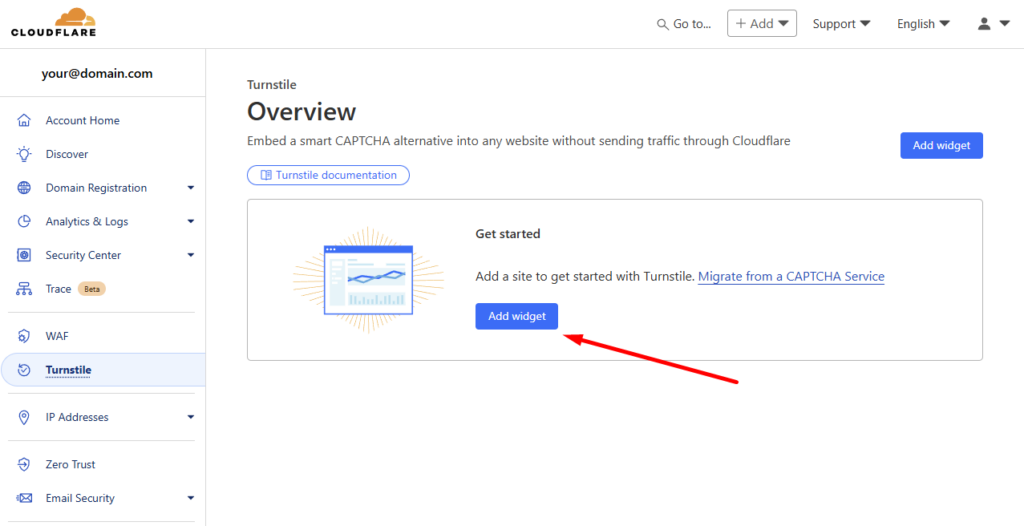
Once the account is ready, you’ll be redirected to the Cloudflare dashboard, where you need to navigate to the Turnstile management section.
Step 2
In the Turnstile management section, add a new CAPTCHA widget.
Step 3
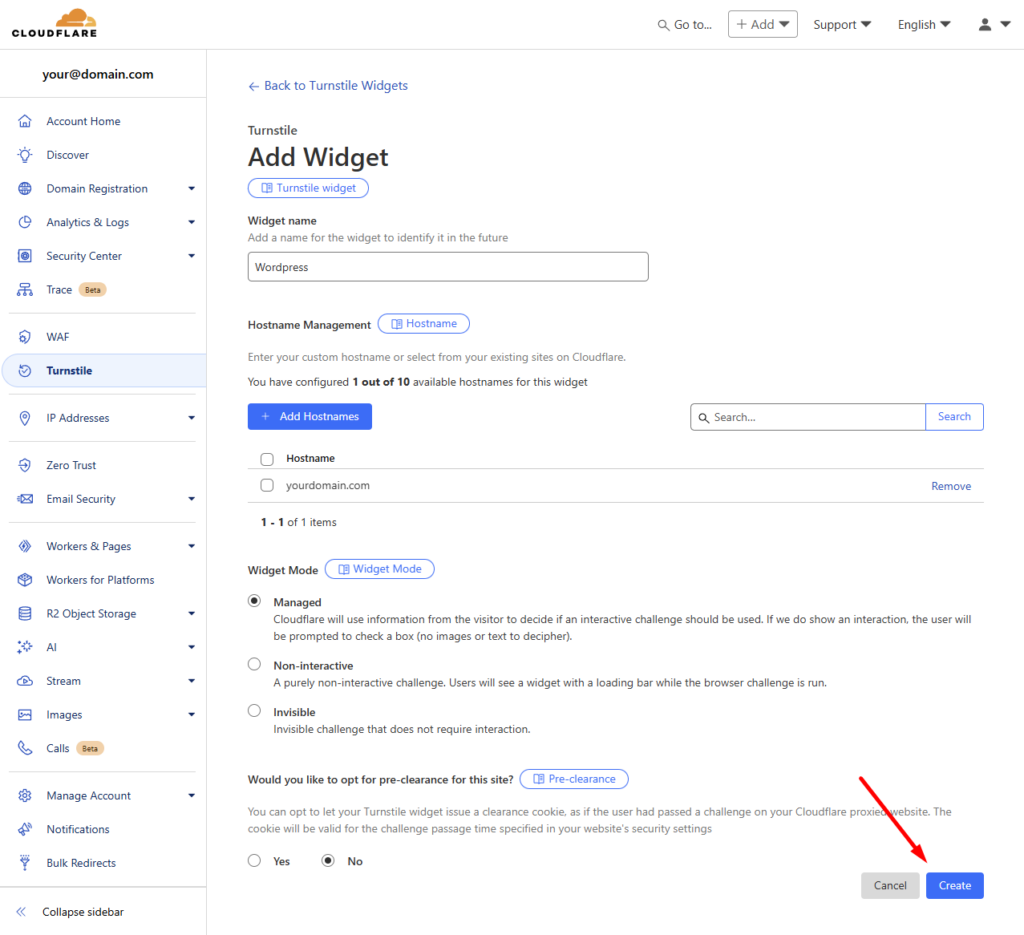
Give the widget a name. This name is only visible in the Cloudflare dashboard.
Step 4
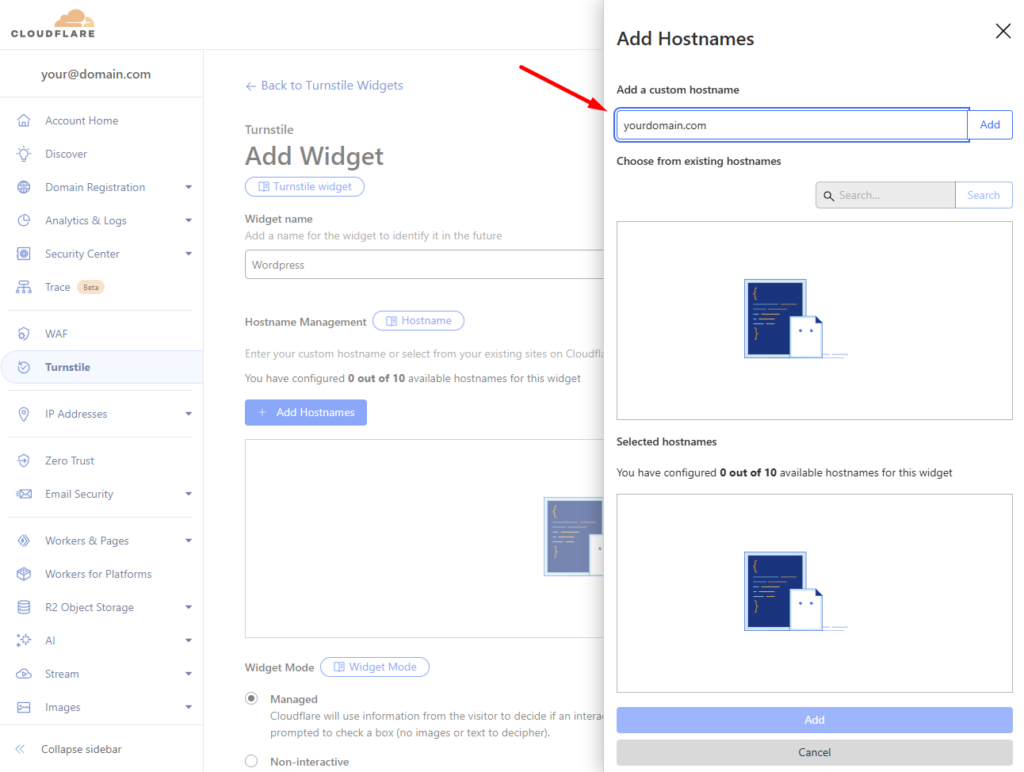
Specify all the domains allowed to use this widget.
Note: If you want to set up Turnstile for a subdomain, include the subdomain name in this step. You can add up to 10 (sub)domains to one widget.
Step 5
After adding all (sub)domains to the hostnames list, click the Add button.
Step 6
Review the settings to ensure they’re correct before creating the widget.
Leave the Widget Mode as “Managed,” which automatically decides whether to display the CAPTCHA based on visitor behavior.
Step 7
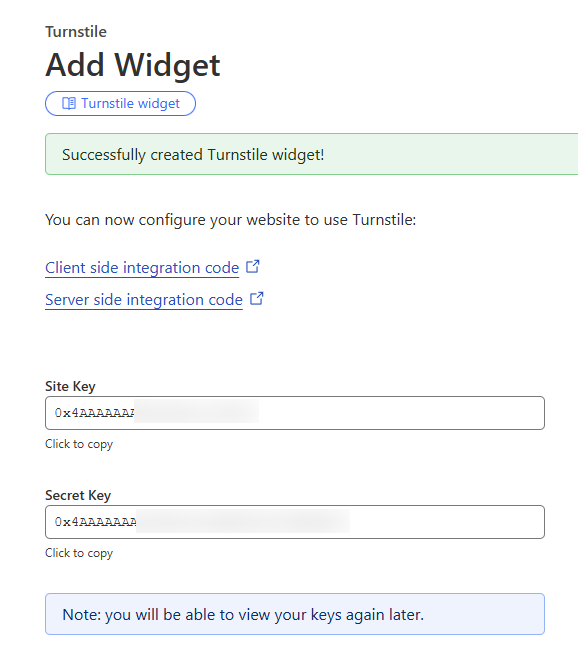
Once the widget is created, you’ll see a Site Key and Secret Key pair. These will be needed in the next step to integrate the widget with your website. You can always access or regenerate these keys in the Cloudflare dashboard.
Step 8
Open the WordPress dashboard and install the Simple Cloudflare Turnstile plugin, then open its settings and input the Site Key and Secret Key from the previous step.
Step 9
Scroll down to select all the forms you wish to protect. You can also protect forms from other plugins in addition to WordPress’s own forms.
After making your selections, click Save Changes.
Step 10
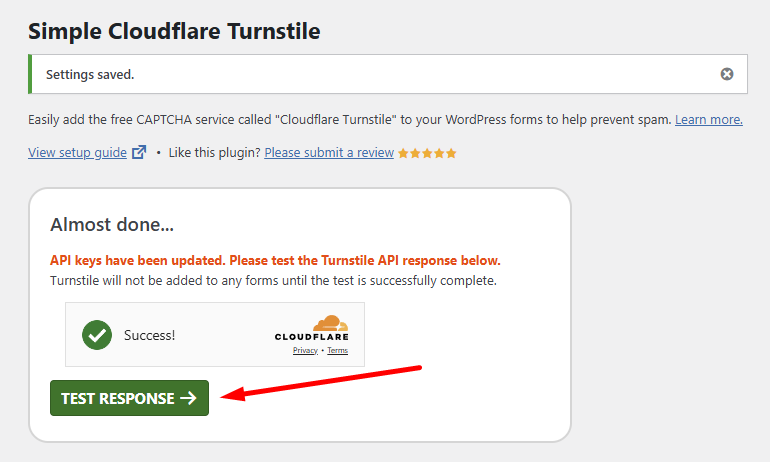
Click the green TEST RESPONSE button that appears on the screen after saving changes. If the test is successful, the CAPTCHA will be activated on the previously selected forms. If it fails, double-check the Site Key and Secret Key.
Step 11
Test the implementation.
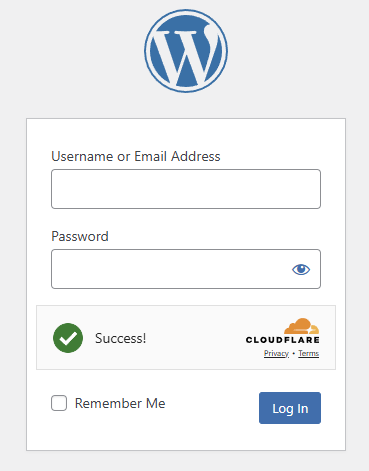
WordPress login form: https://yourdomain.com/wp-login.php
WordPress registration form: https://yourdomain.com/wp-register.php
You should now see the Cloudflare Turnstile widget displayed on the forms.
Google reCaptcha
Step 1
To protect forms with Google reCAPTCHA, log in to the Google reCAPTCHA dashboard.
Step 2
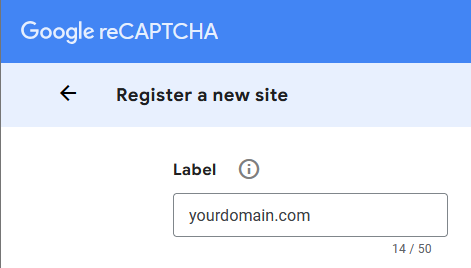
After logging in, you’ll be able to create a new CAPTCHA. Assign a label, such as your domain name.
Step 3
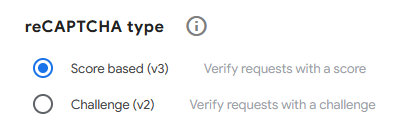
Select Score based (v3) as the CAPTCHA type.
Step 4
Specify the domain name that will use the CAPTCHA.
Note: Unlike Cloudflare Turnstile, subdomains do not need to be specified separately for Google reCAPTCHA.
Step 5
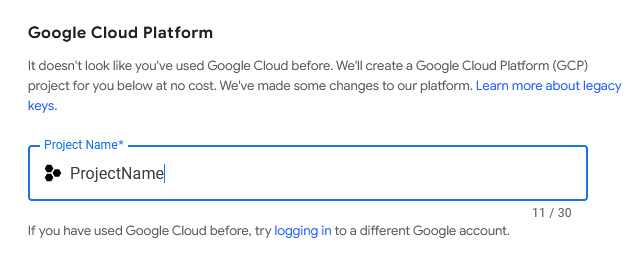
Give a name to the project.
Step 6
Read through and agree to the Google reCAPTCHA terms.
Step 7
Click SUBMIT.
Step 8
You’ll see a Site Key and Secret Key pair on the next screen. These will be used in the next step to integrate reCAPTCHA with your website. You can view these keys anytime in the Google reCAPTCHA dashboard.
Step 9
Now that the API keys have been made, install a Google reCAPTCHA plugin on your website.
In this example. we will be installing and configuring the Advanced Google reCAPTCHA plugin.
Open the plugin settings and select Google reCAPTCHA v3 as the CAPTCHA type.
Step 10
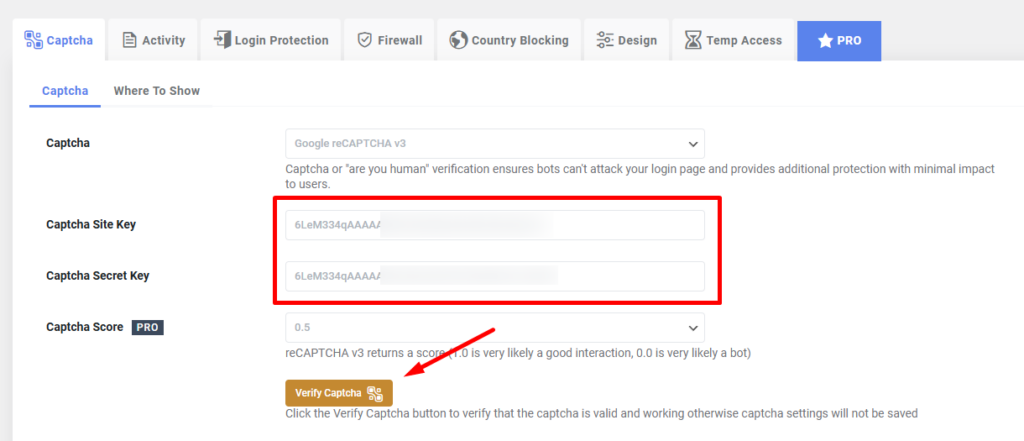
Enter the Site Key and Secret Key in the respective fields. Click Verify Captcha to ensure the keys are correct.
Click Submit Captcha in the popup window to complete the verification.
Captcha is successfully verified.
Step 11
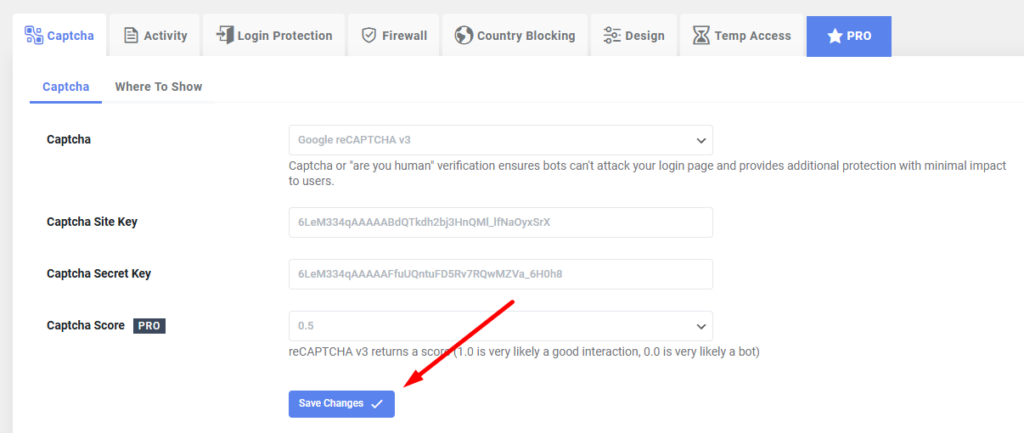
Click Save Changes to save the configuration.
Step 12
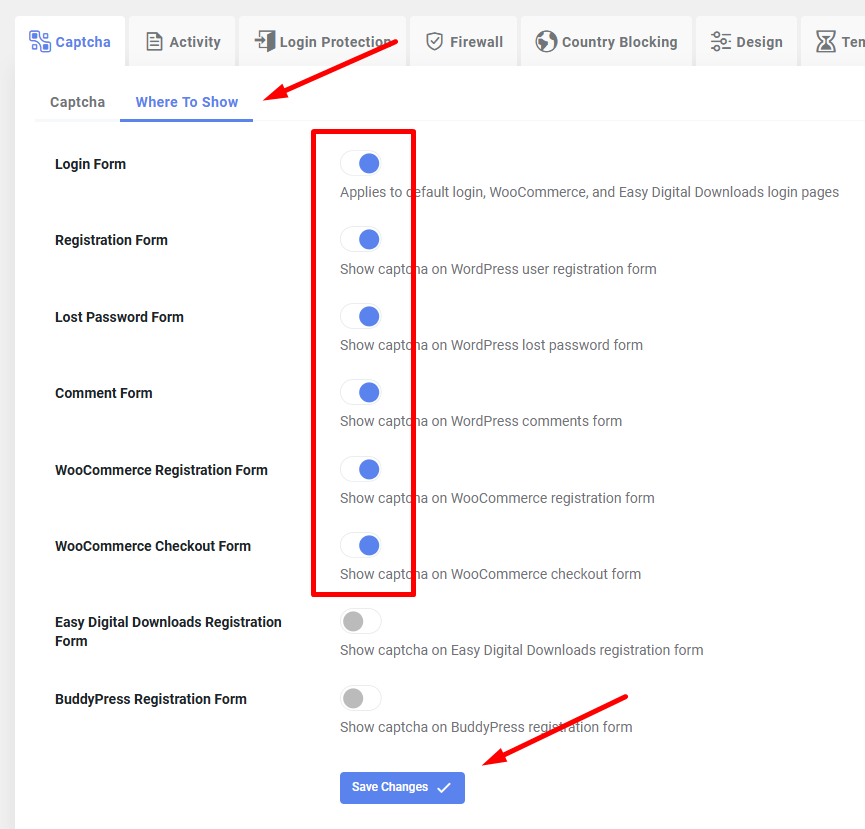
Under the Where To Show tab, select which forms should be protected by the CAPTCHA.
Step 13
Test the implementation.
- WordPress login form:
https://yourdomain.com/wp-login.php - WordPress registration form:
https://yourdomain.com/wp-register.php
You should see the Google reCAPTCHA logo in the bottom-right corner of the website.


