Installation
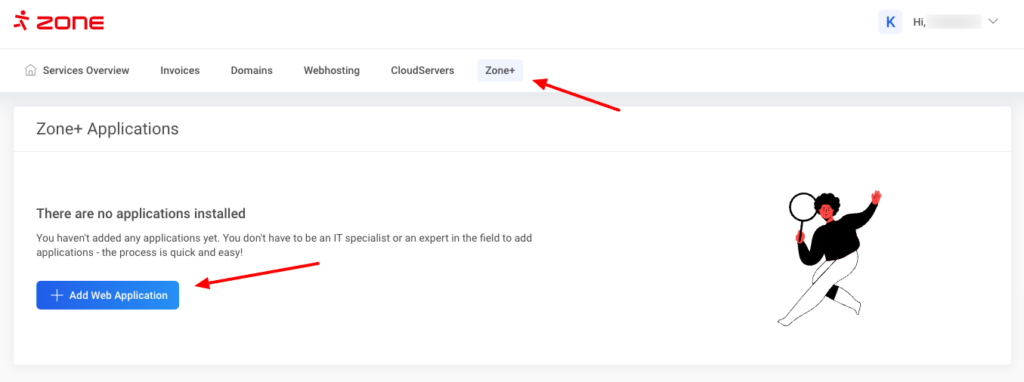
To install an application, log in to My Zone service management environment and click on Zone+ from the top menu.
Click the + Add Web Application button.
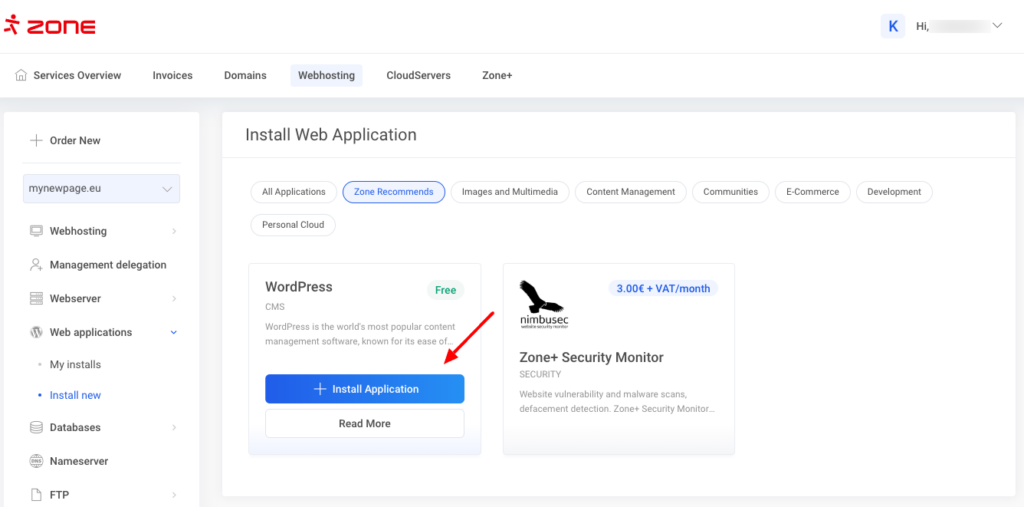
Then you will see different applications that can be installed on your hosting service.
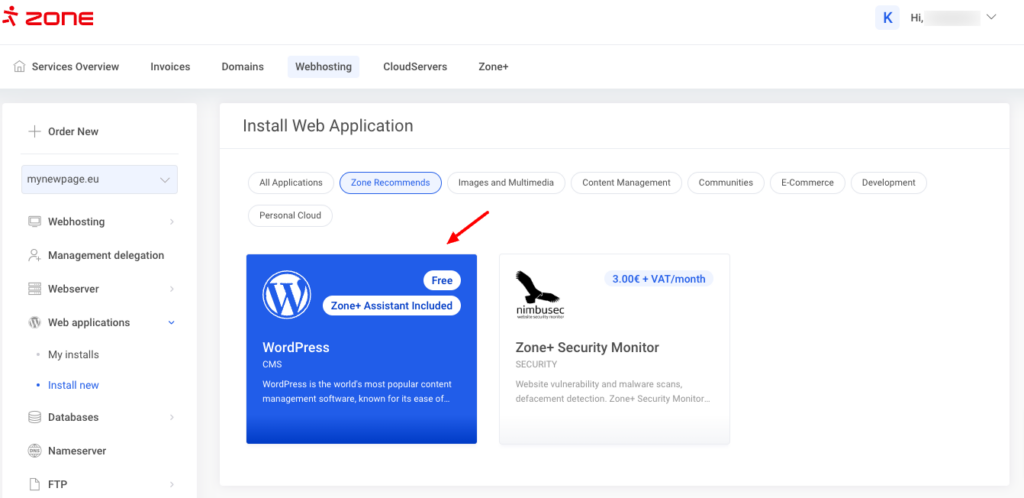
Hover over the application you wish to install and click + Install Application.
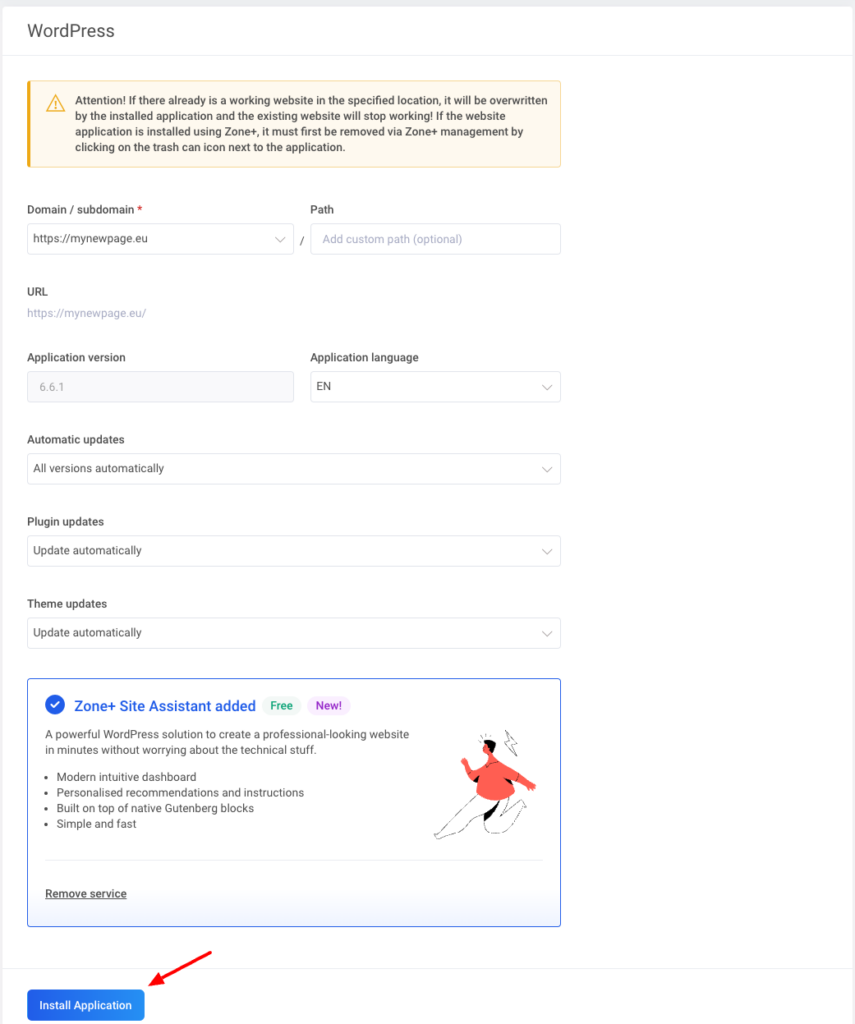
Then click Install Application.
Copying
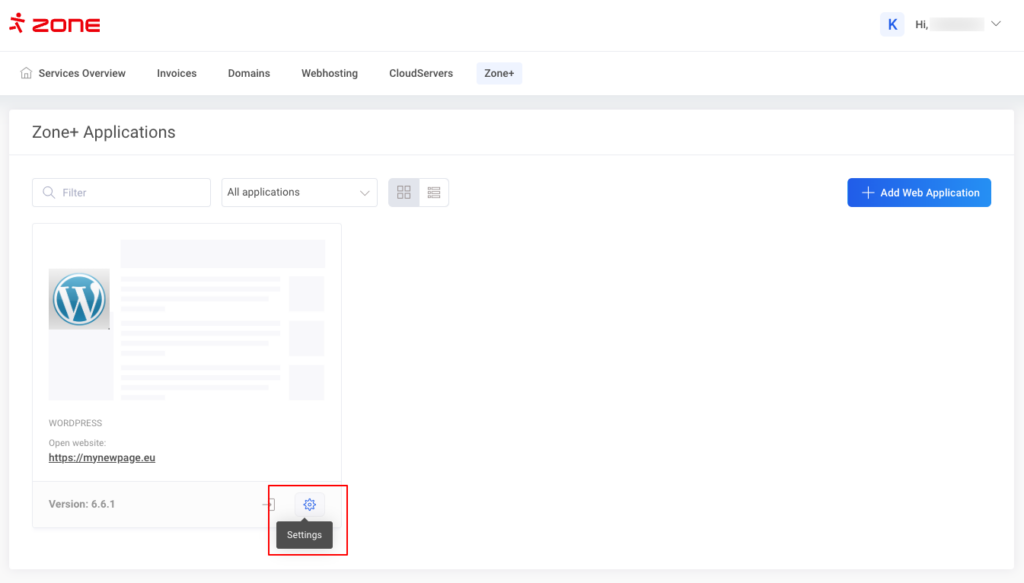
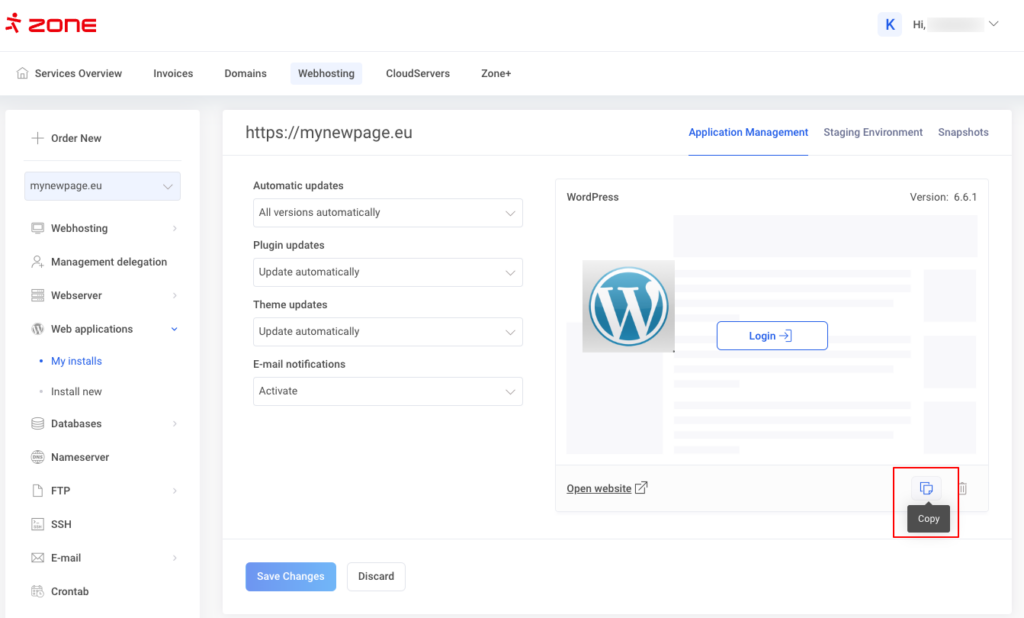
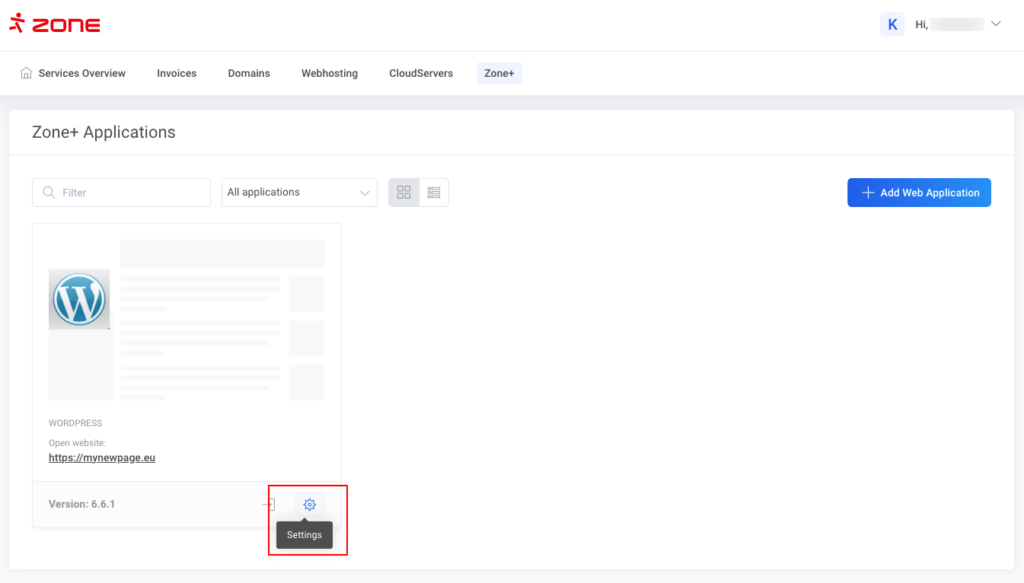
To create a copy of an application choose My installs from the Webhosting–> Web applications menu and click on gear icon/ Settings.
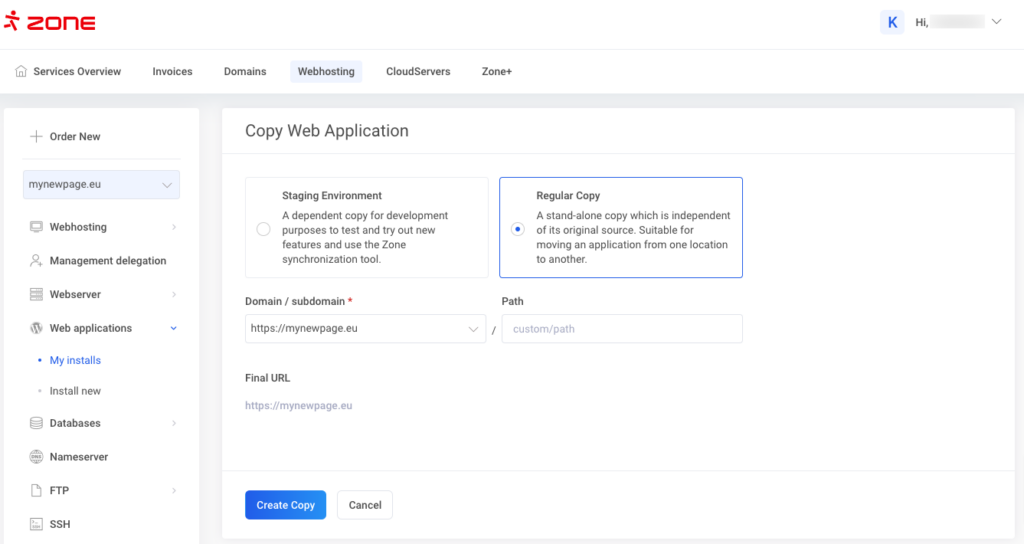
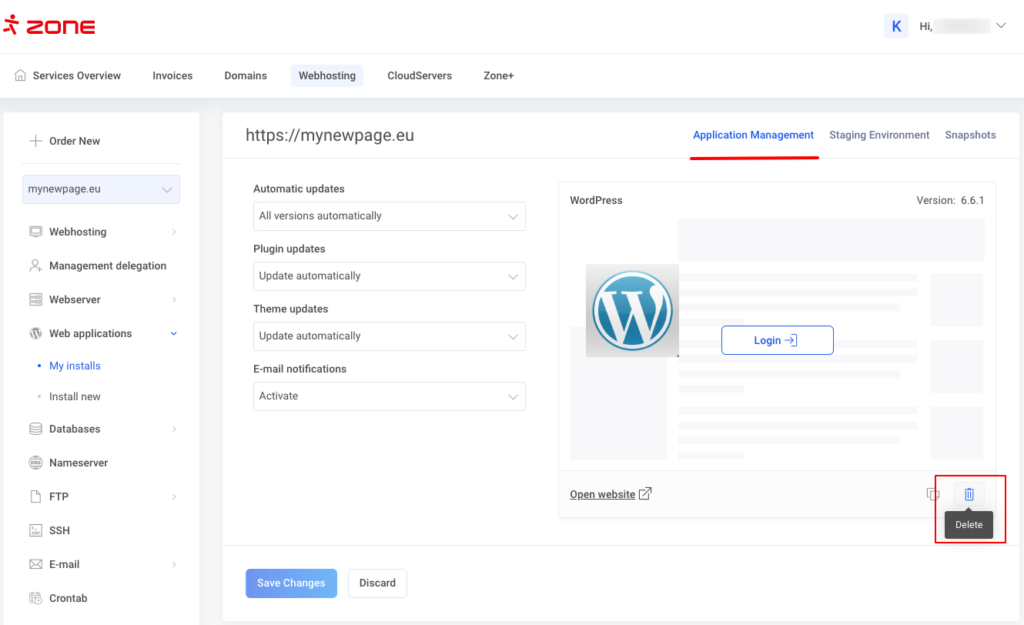
From the next window, click Copy
Choose the path for the copy. The Path field will stay empty by default – fill it in only if you deliberately wish to install the application to a domain’s subfolder.
Automatic updates
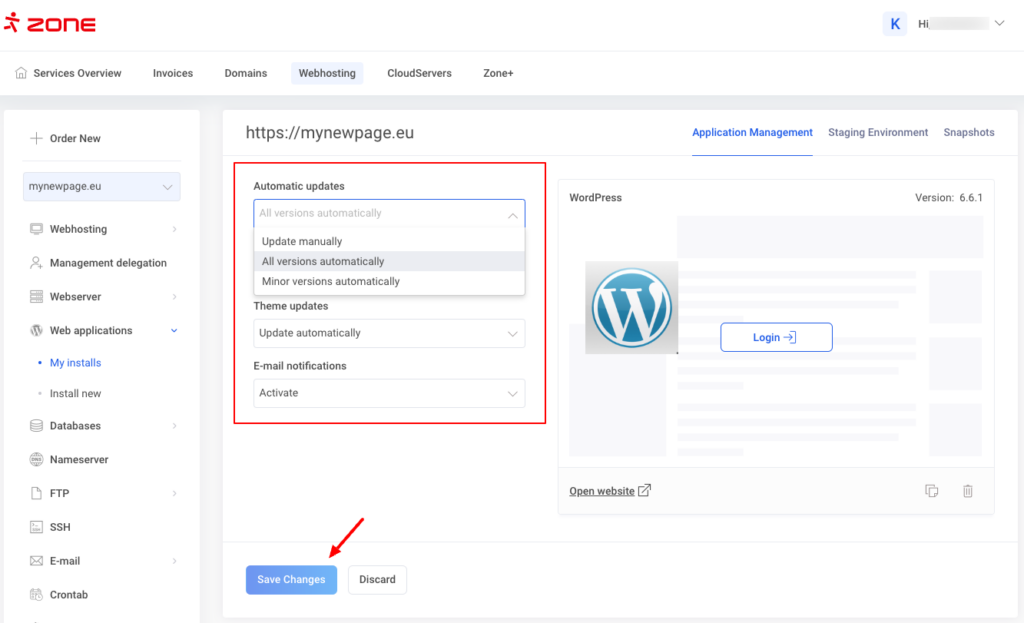
Apps installed through Zone+ all have automatic upgrades turned on by default. If necessary, it is possible to turn off major updates (Minor version updates) or turn off automatic updates completely.
Snapshots and restoring from them
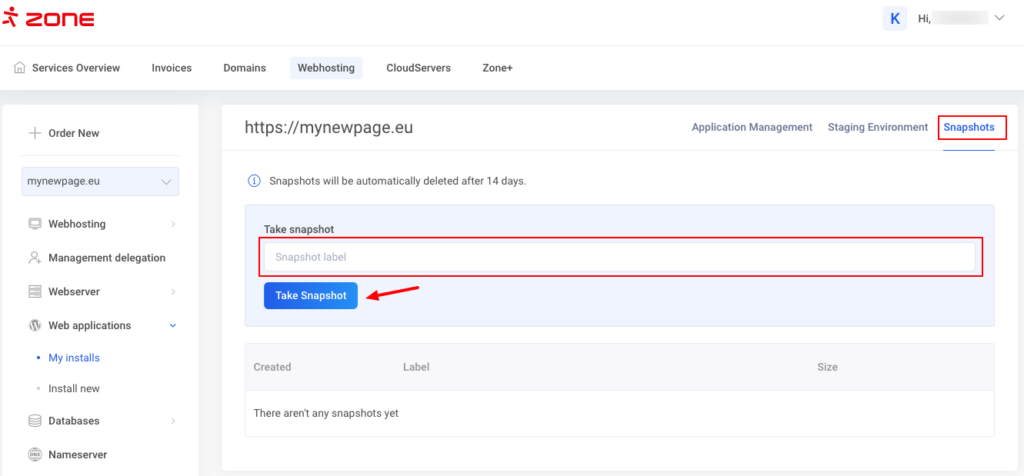
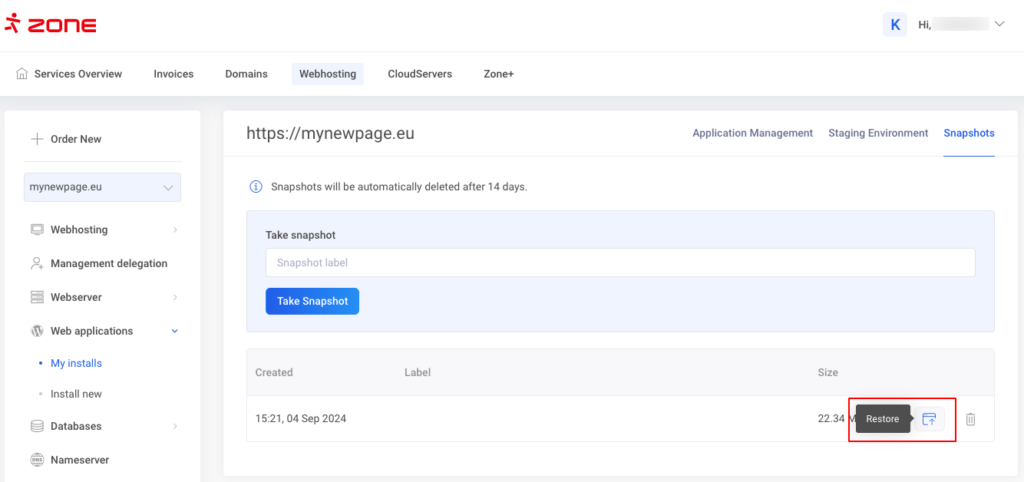
To create a snapshot of an application installed via Zone+, press the Take snapshot button in the Snapshots view. As a result, a separate copy of the website’s files and database is created on the server. Snapshots are stored on the server in zoneplus_snapshots folder and are kept for 14 days.
To restore your web application from a snapshot, click on Restore button, after which the application’s files and database will be restored as of the date and time indicated.
Deleting
To delete an application choose My installs from the Webhosting–> Web applications menu and click on gear icon/ Settings.
From the next window, click Delete

